Exploring Automated Penetration Testing with AWS Security Agent
Sumit Kumar Dubey
7 min read

Modern applications are becoming increasingly complex as organizations adopt cloud-native architectures and rapid deployment practices. While these advancements improve scalability and development speed, they also introduce new security challenges. Identifying vulnerabilities before they can be exploited is a critical part of maintaining a strong security posture.
Traditionally, security teams rely on a combination of architecture reviews, code analysis, vulnerability scanning, and manual penetration testing to evaluate the security of applications. However, performing these activities continuously across evolving cloud environments can be difficult and often requires significant manual effort.
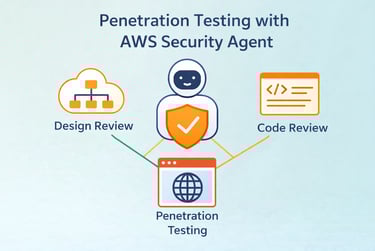
To help address these challenges, AWS introduced AWS Security Agent, a service designed to analyze applications from multiple security perspectives. The service is capable of performing design reviews, code analysis, and penetration testing, allowing teams to identify potential weaknesses across different stages of the application lifecycle.
In this blog, the focus will specifically be on the penetration testing capability of AWS Security Agent. Penetration testing allows the service to simulate real-world attack scenarios against a running application in order to identify exploitable vulnerabilities.
To explore this capability, I performed a penetration test against a deliberately vulnerable web application and analyzed the results generated by AWS Security Agent. In the sections that follow, we will walk through how the penetration testing workflow operates, what stages are involved in the process, and the types of vulnerabilities that can be identified during the test.
Lab Setup / Test Environment
To demonstrate the penetration testing capability of AWS Security Agent, we first need a target application running in an AWS environment. For this experiment, we will deploy OWASP Juice Shop, a deliberately vulnerable web application commonly used for security testing and training.
The application will run inside a Docker container on an Amazon EC2 instance. Instead of exposing the EC2 instance directly to the internet, the instance will be placed behind an Application Load Balancer (ALB). The ALB will handle incoming traffic and forward requests to the EC2 instance hosting the application.
The setup used in this experiment includes the following components:
Application Load Balancer (ALB) – Exposes the application to the internet and forwards incoming traffic to the backend instance.
Amazon EC2 Instance – Hosts the Docker environment and runs the vulnerable application.
Docker – Used to build and run the Juice Shop application container.
OWASP Juice Shop – A deliberately vulnerable web application that serves as the penetration testing target.
AWS Security Agent – Performs automated penetration testing against the application endpoint exposed through the ALB.
Once the application is deployed and accessible through the ALB DNS endpoint, AWS Security Agent can be configured to run a penetration test against the application and generate security findings.
In the next section, we will launch an EC2 instance, install Docker, and deploy the Juice Shop application that will serve as the target for penetration testing.
Deploying the Vulnerable Application
To perform penetration testing using AWS Security Agent, we first need a vulnerable web application running in our environment. For this demonstration, we will deploy OWASP Juice Shop, an intentionally vulnerable application widely used for security training and testing.
The application will be deployed inside a Docker container running on an Amazon EC2 instance. Docker makes it easy to package the application and its dependencies into a container, allowing us to quickly deploy the test environment.
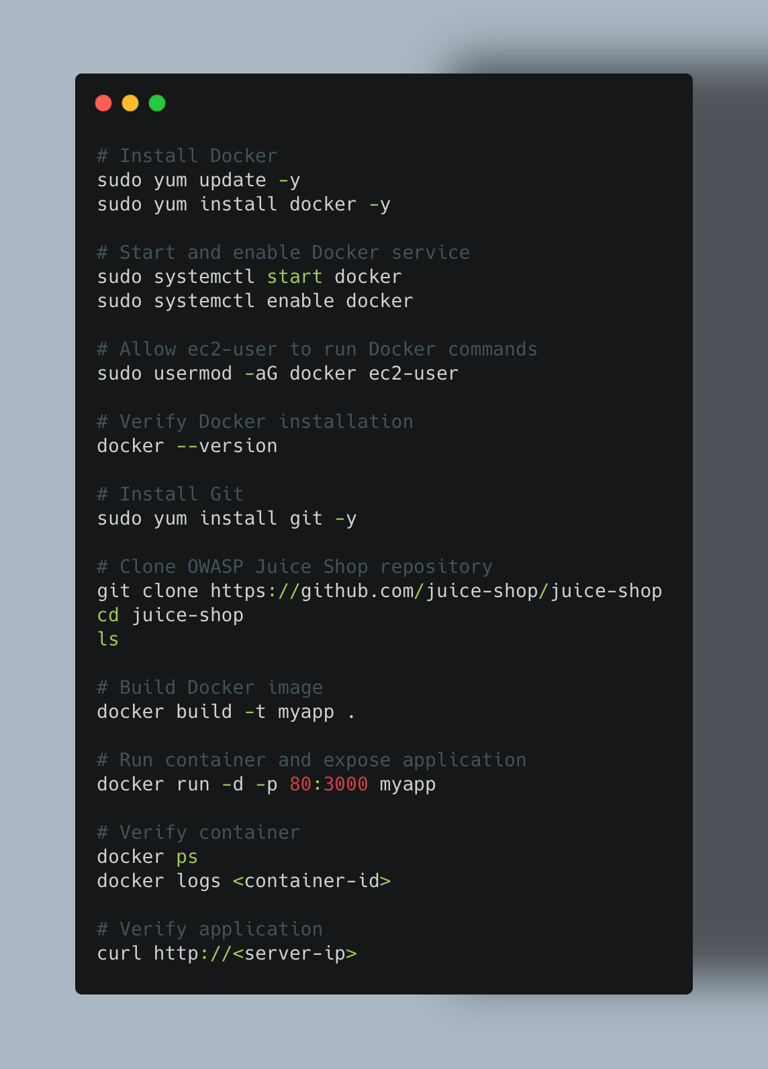
The following steps perform the complete setup:
• Install Docker on the EC2 instance
• Install Git to download the application source code
• Clone the OWASP Juice Shop repository
• Build the Docker image
• Run the container and expose the application on port 80
• Verify that the application is running successfully
The commands used to deploy the application are shown below.
Setting Up AWS Security Agent
After deploying the vulnerable application, the next step is to configure AWS Security Agent to perform penetration testing against the application.
AWS Security Agent provides a centralized interface for running automated security assessments, including design reviews, code reviews, and penetration testing. In this blog, we will focus specifically on configuring and running a penetration test against our deployed OWASP Juice Shop application.
Creating an Agent Space
To begin, navigate to AWS Security Agent from the AWS console.
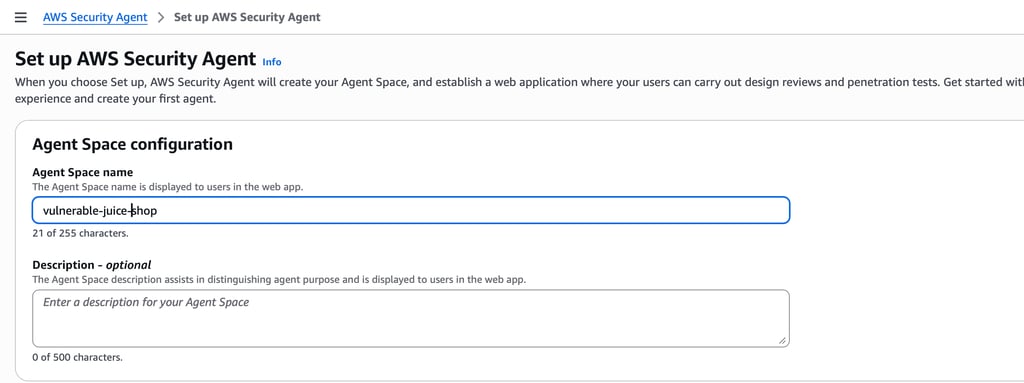
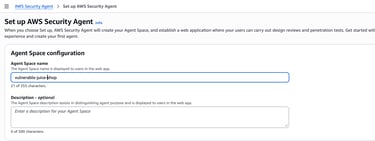
When you open the service for the first time, you will see the setup page where you can create an Agent Space. An Agent Space acts as a workspace where security activities such as penetration tests and design reviews are managed.
Provide a name for the Agent Space.
Example: vulnerable-juice-shop
Once the Agent Space is created, AWS Security Agent provisions a workspace where security operations can be performed.
Enabling Penetration Testing
After creating the Agent Space, you will see the dashboard displaying the available security capabilities.
These include:
Design Review
Code Review
Penetration Testing
In this blog, we will enable and configure Penetration Testing.
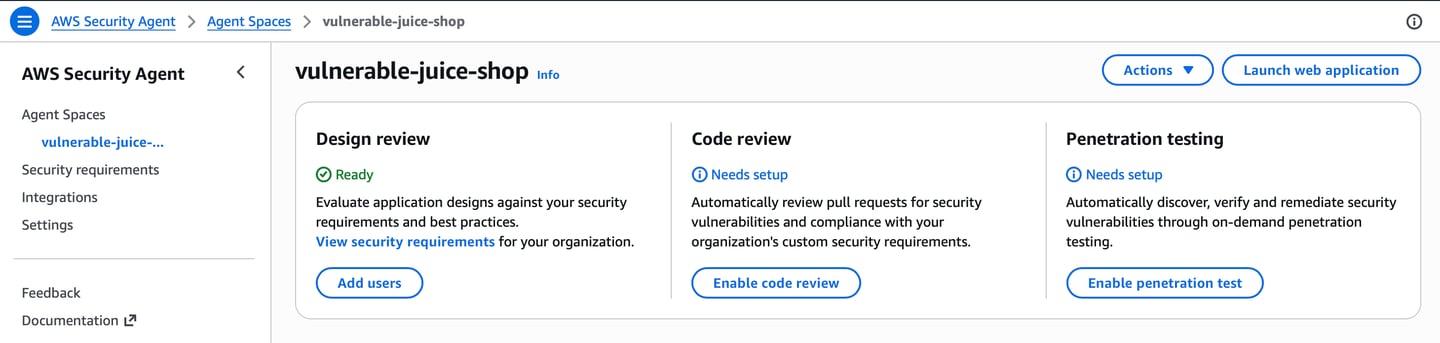

Click Enable penetration test to begin the configuration process.
Configuring the Target Domain
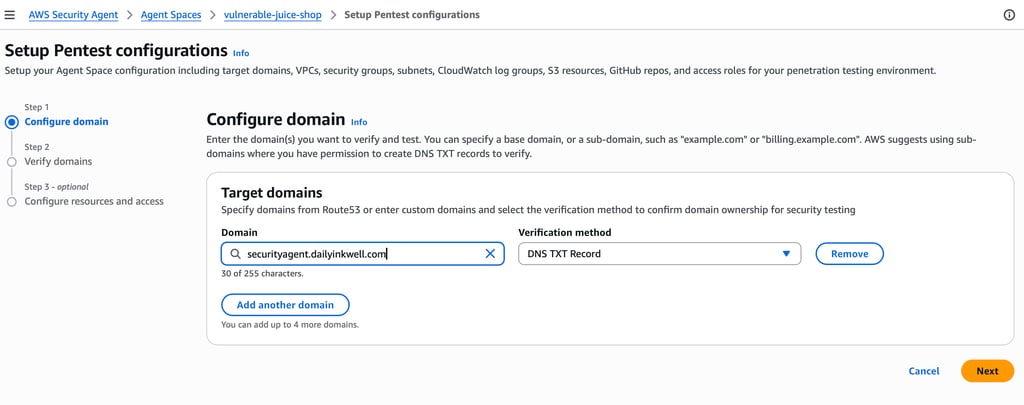
Next, we need to specify the target domain that AWS Security Agent will test.
Example Target Domain: securityagent.dailyinkwell.com
After entering the domain, AWS Security Agent requires verification of domain ownership before allowing penetration testing.
Verifying Domain Ownership
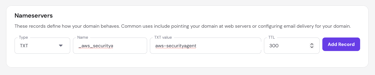
To verify ownership of the domain, AWS Security Agent generates a DNS TXT verification record.
This record must be added to the DNS configuration of the domain.
Example:
Name: awssecurityagent-domain
Type: TXT
Value: aws-securityagent-domain-verification=<token>


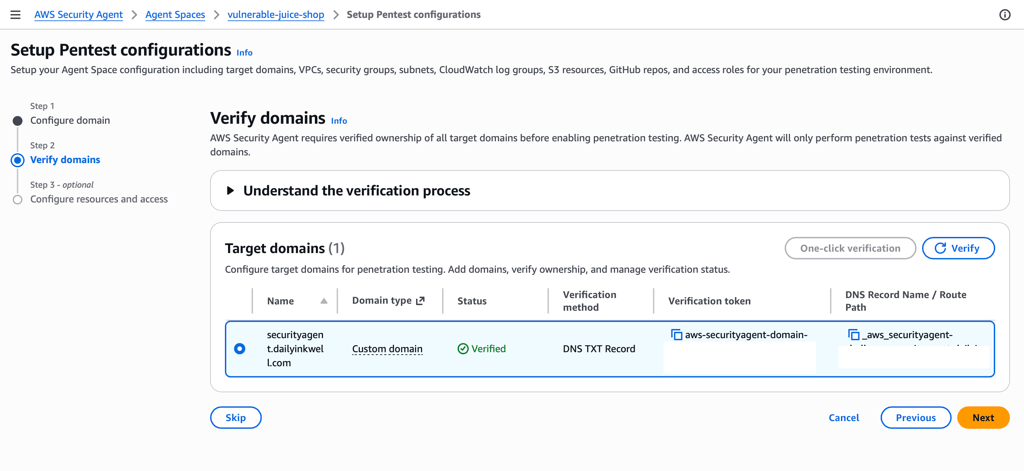
After adding the DNS record, return to the AWS Security Agent console and click Verify.
If the DNS record is correctly configured, the domain status will change to: Verified
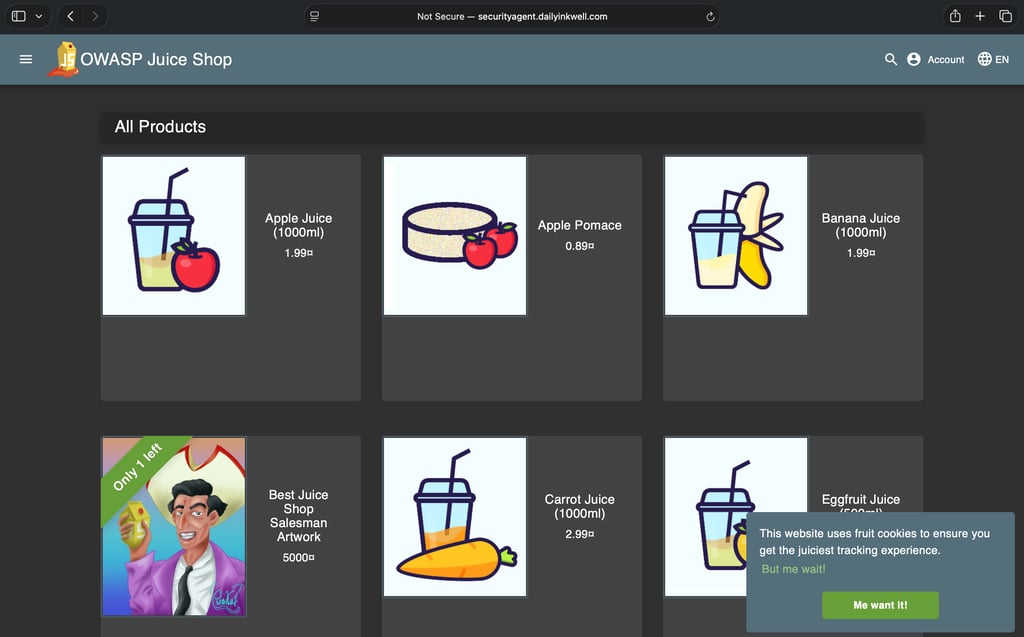
In our environment, the OWASP Juice Shop application is deployed behind an Application Load Balancer (ALB). A custom domain, securityagent.dailyinkwell.com, is mapped to the ALB’s CNAME record, allowing users to access the application through the domain.
The vulnerable Juice Shop application appears as shown below.
Accessing the Security Agent Web Porta
After the domain has been successfully verified, return to the Agent Space dashboard. From here, you can access the AWS Security Agent web application that is used to manage penetration tests.
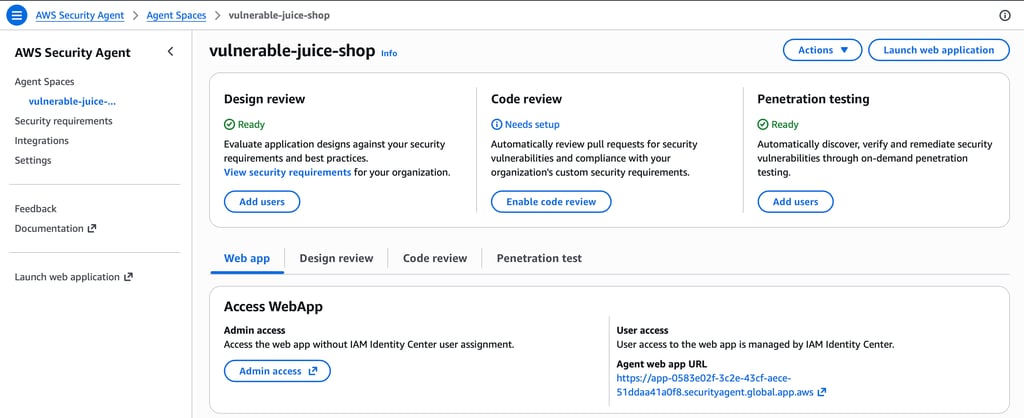
Under the Web app section, locate Access WebApp and click Admin access. This will open the AWS Security Agent portal in a new browser tab.
Clicking Admin access launches the AWS Security Agent web application.
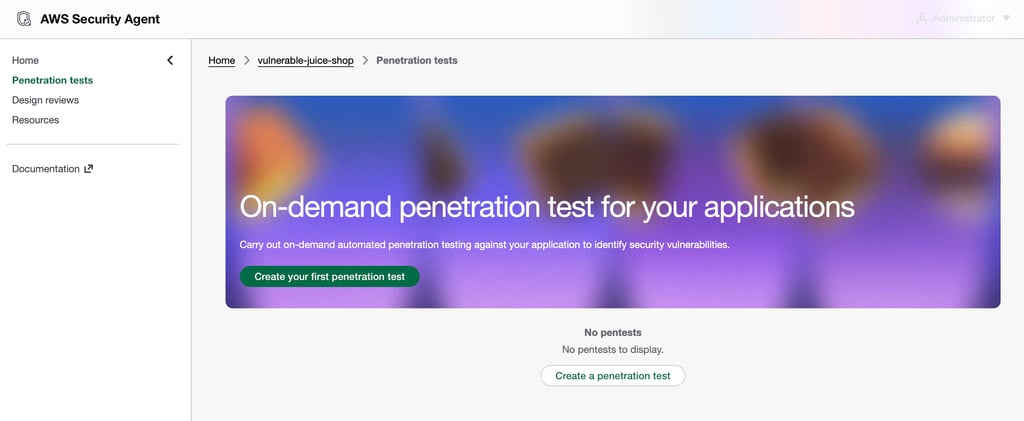
Creating a Penetration Test
Inside the AWS Security Agent portal, navigate to Penetration tests from the left navigation menu. To create a new test, click Create a penetration test.
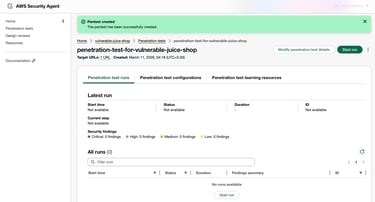
Next, configure the penetration test by providing the required details. After filling in the required details, proceed to create the penetration test.
Running the Penetration Test
After creating the penetration test, start the test run by clicking Start run. AWS Security Agent will begin executing the penetration test against the configured target URL.

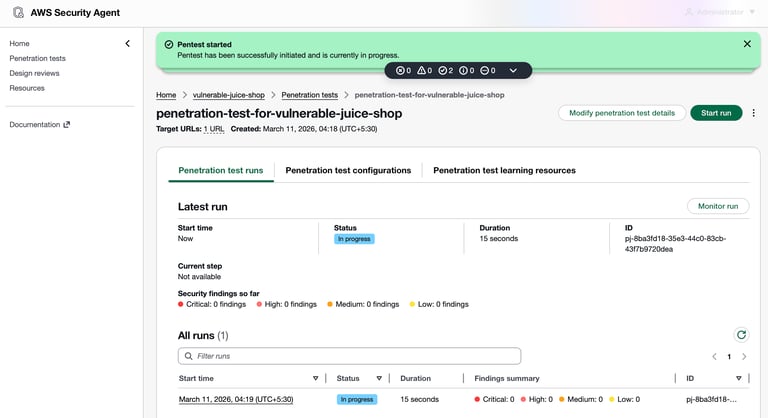
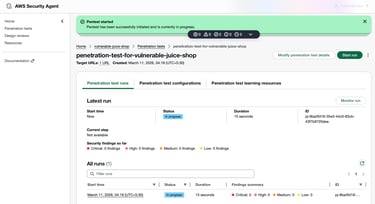
During execution, the test progresses through several stages:
Preflight – Verifies connectivity and validates the configuration of the penetration test.
Static analysis – Analyzes the application structure and identifies potential entry points for testing.
Pentest – Executes automated attack scenarios against the application to identify exploitable vulnerabilities.
Finalizing – Consolidates the findings and prepares the final report.
These stages ensure that the test is performed systematically while minimizing the risk of false positives.
The penetration test may take a few hours to complete. Once the test finishes, you can review the findings.

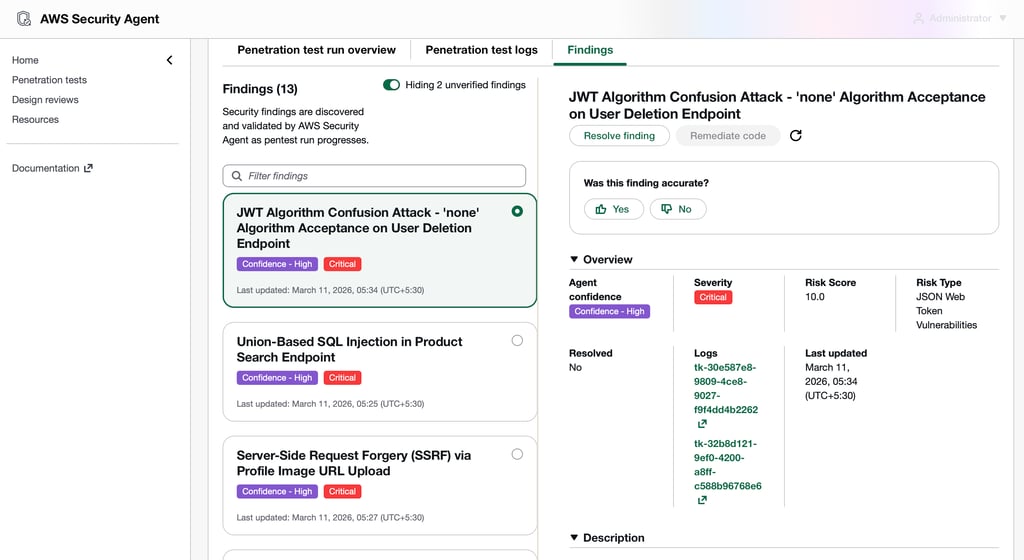
You can also generate and download a very detailed report by selecting the “Generate report” option.

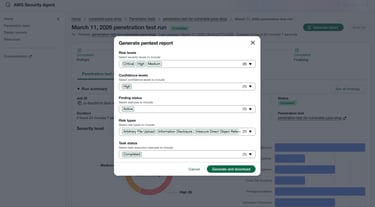
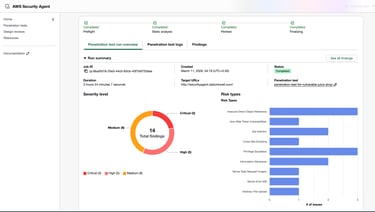
The generated report provides a detailed overview of the discovered vulnerabilities, including severity levels, affected endpoints, risk reasoning, and reproduction steps. This helps security teams clearly understand the vulnerabilities present in the application and prioritize remediation efforts.
Observations and Security Perspective
After the penetration test completed, the AWS Security Agent generated a detailed report outlining the vulnerabilities it discovered in the application. The report provides insights into potential security weaknesses along with recommendations for remediation.
This automated testing can help security teams quickly identify common vulnerabilities in exposed applications and improve their overall security posture.
While AWS Security Agent demonstrates promising capabilities in automating penetration testing tasks, it should not be considered a complete replacement for traditional manual penetration testing. Automated tools are effective at identifying common vulnerabilities and performing initial reconnaissance, but complex business logic flaws and advanced attack scenarios still require human expertise.
However, tools like AWS Security Agent can significantly enhance security workflows by enabling early vulnerability detection and continuous security validation during development and testing phases.
Conclusion
In this walkthrough, we deployed the OWASP Juice Shop vulnerable application and used AWS Security Agent to perform automated penetration testing.
We configured the application environment, verified domain ownership, created a penetration test, executed the scan, and finally generated a detailed security report highlighting the discovered vulnerabilities.
AWS Security Agent simplifies the process of performing security assessments by automating vulnerability discovery and providing actionable insights through detailed reports. This makes it easier for security teams to identify potential risks and improve the overall security posture of their applications.
Disclaimer
The activities demonstrated in this blog are performed in a controlled environment using intentionally vulnerable applications such as OWASP Juice Shop. The purpose of this walkthrough is purely educational and to demonstrate how automated penetration testing can be performed using AWS Security Agent.
Do not attempt to scan, test, or exploit vulnerabilities in systems, applications, or networks without explicit authorization from the system owner. Unauthorised security testing may violate laws, regulations, and organizational policies.
Always perform security testing only within environments where you have proper permission and follow responsible disclosure practices when reporting vulnerabilities.
Daily Ink Well
© 2024. All rights reserved.